
Tutorial: Hex Maps and Hidden Information on Roll20
Running a hex-based wargame campaign on Roll20

A few people have reached out and asked how I utilize Roll20 for my world map and what software and settings I’m using to show my players the world map for the campaign, so instead of answering people individually, I’m just going to leave everything here so I can link back to this when I get questions about my map.
This is not an advanced tutorial, but it will cover using large hex maps and handling hidden map information in Roll20 for a group game. Some of this is basic, but there are a few cool tricks in here that will make running a 4x wargame easier using these tools.
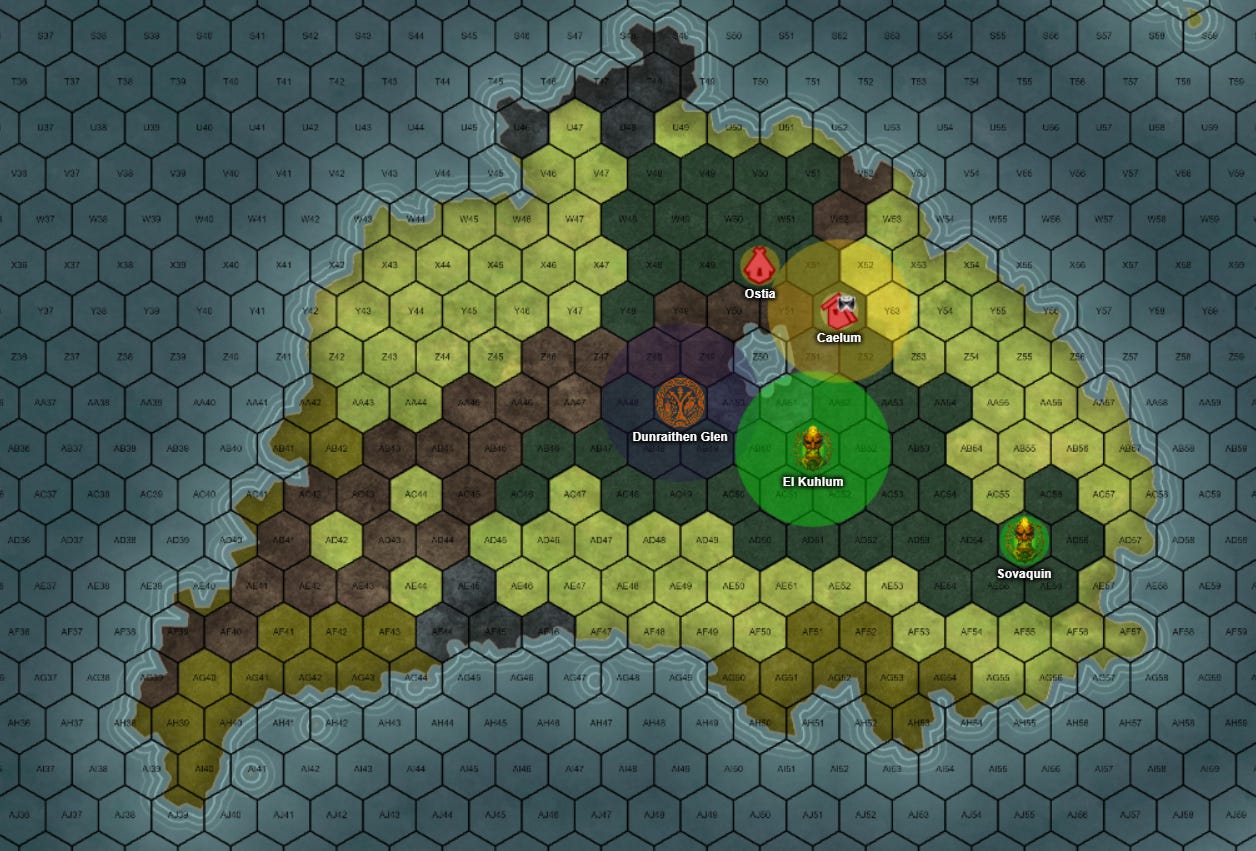
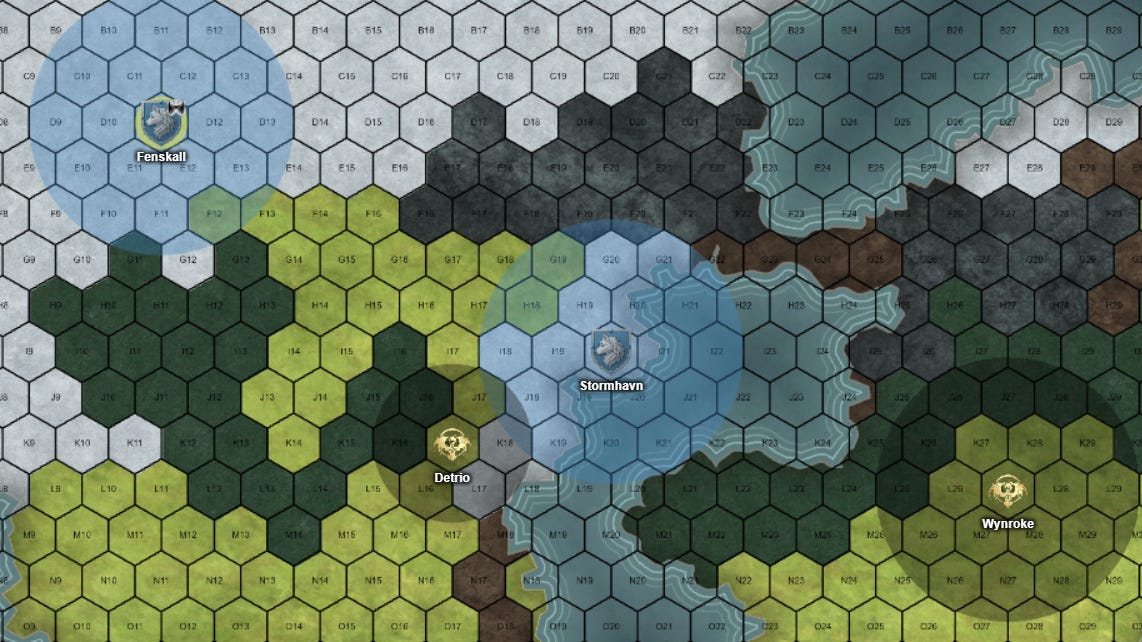
Here are a few screenshots of my world map- you can see we have a few player settlements with auras representing their area of influence.
Software and Tools
For my hex maps, I use the following tools:
Inkarnate - I use Inkarnate to make the world map before importing it into Roll20. You may need a sub for some advanced features, but most things in this tutorial may be done with a free account.
Roll20 - I have a pro subscription, but everything in this tutorial may be done with a free account.
Hex Map Setup on Inkarnate
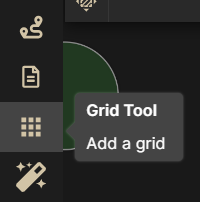
Inkarnate is pretty easy to get the hang of. Nearly all tools on Inkarnate can be applied to hexes. First, you want to set up a grid on your map using the grid tool.
I don’t think it really matters if you select vertical or horizontal hexes. Sid Meier’s Civilization games use vertical hexes, so that is what I used, but the Outdoor Survival map uses horizontal hexes, so either has precedent in this sort of game. I prefer vertical hexes if the map is wide and horizontal hexes if the map is tall, but this is a matter of personal preference. Here are my settings for my map intended for 15 players. Yours may be smaller, assuming you have fewer players. Ideally, the players should have enough room to expand their empires, but the world should be small enough to force them into conflict.
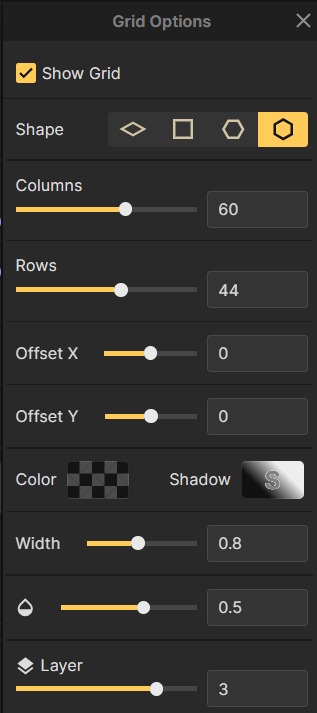
The settings above are what I used for my full map, which worked well when transferred to Roll20.
Something to note about Inkarnate is that both the columns and rows are not going to be accurate. If you set it to 40 columns, it will give you about 44, so you’ll probably have to manually count them to know how many you have.
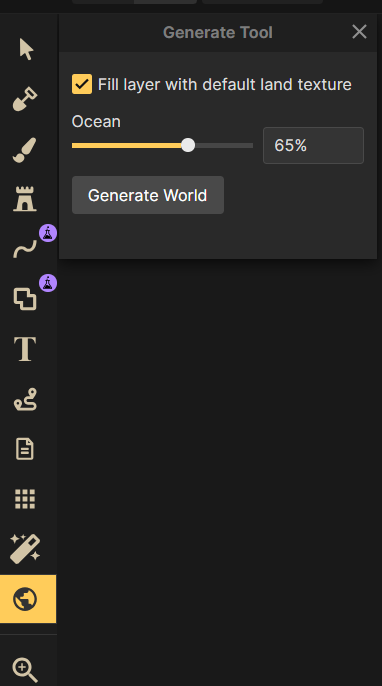
Another feature on this site that I use often is the randomization tool. If you don’t know what your map should look like, there’s a good randomization tool built in that will give you a good starting point with random landmasses. You may just hit the random button a few times until you find something that seems interesting. I used these as a starting point for my hex map
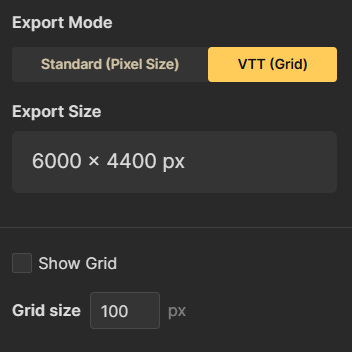
I recommend saving often if you use Inkarnate because it is occasionally prone to random crashes. I make backups of my maps just in case. When you export your map, even if you are using a hex grid, it works better to have the grid turned off if you plan to import it into Roll20.
Hex Map Setup on Roll20
Hex map setup on Roll20 is fairly straight forward. Before you change the map to hexes, use the grid map and set your dimensions correctly. Then, upload your hex map on the Roll20 default grid layout. Once your map is uploaded, right click it and send it to the map layer. The reason to do it this way is that Roll20 will not snap your map into place if you are using a hex grid.
Once you’ve done this, go to the map settings again and turn your grid to a hex grid (using the same type of hexes that you used on Inkarnate). I keep “show hex labels” on because it allows the players to refer to a hex. Here are the settings that I use:
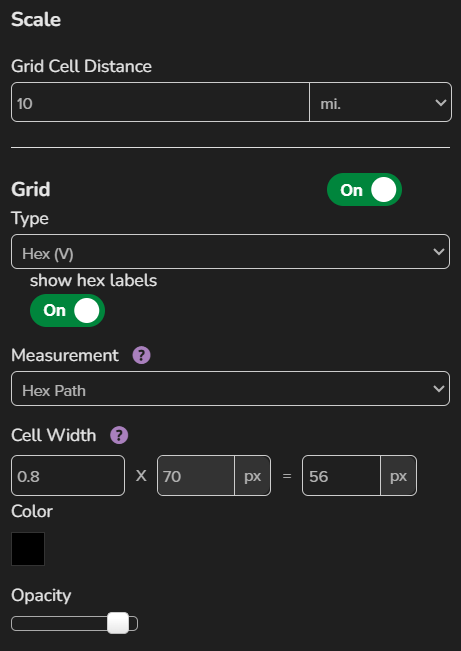
I also recommend setting the units of measurement to miles and changing it to 5 mile, 6 mile or 10 mile hexes, whatever you plan on using. As you can see, my map is set to use 10 mile hexes. This will let players easily measure the distance between areas using the Roll20 measure tool.
You may have to play with the size and alignment of your hex map a little bit after this step. Aligning it with the roll20 grid can be challenging since roll20 won’t snap it into place automatically. Hold alt while you maneuver and resize it to avoid Roll20 snapping it into the place of the square grid.
Once you do this, you can upload tokens to the token layer for your settlements and other points of interest on the map. I let my players give me their own sigils to use for their settlements, and for the ones who didn’t do this, I uploaded and used a set of icons from Skyrim, which you can find with a quick search of “Skyrim map icons”.
I put auras under each of them that are viewable to all players that represent their spheres of influence, which has specific rules in-game. Just make sure you check the box here that gives everyone permission to see the aura.
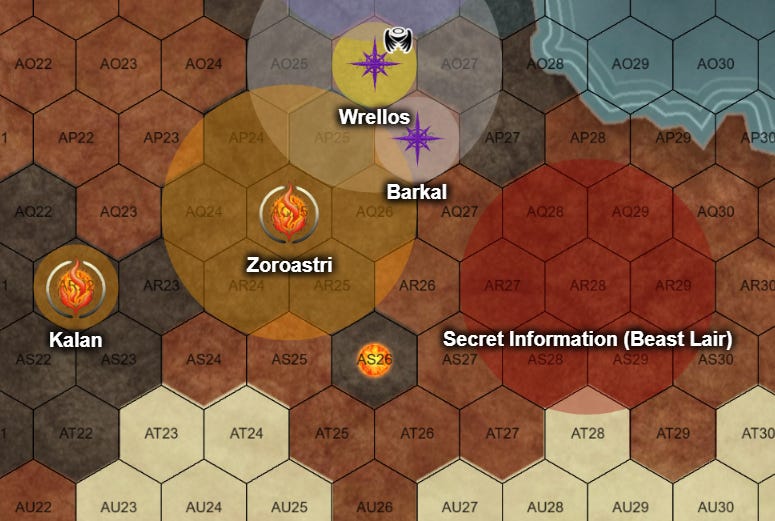
Hidden Information (and the most useful trick I know)
There is one image that, when uploaded to Roll20, single-handedly allows you to add information to your map that is only visible to players you choose. By uploading this image, you can put tokens on the map that are visible to no players, all players, or select players. Here is the image:

Did you get that? It’s a completely transparent png, and it’s the most useful image you can upload to Roll20. If you can’t save it from here, you can make your own on Paint in about 1 minute. You can use it to make hidden information on the map and set the permissions to allow some people to see, but not others.
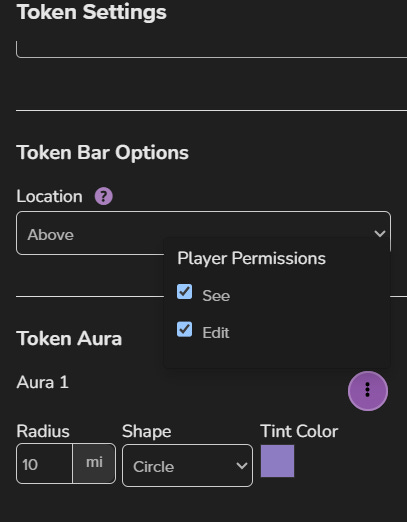
First, give it a name and aura. If you give it an aura of 0, you can put a small circle around it. Expand the aura to make it bigger. Make sure the aura is set to only edit and not see. This means that players who have edit permissions on that token can see it, but not those without. Then choose players you wish to have edit permissions on that token.
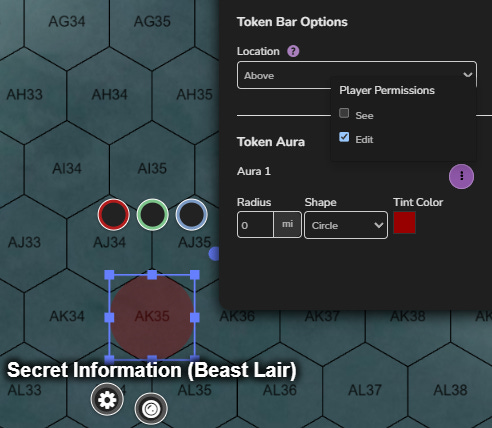
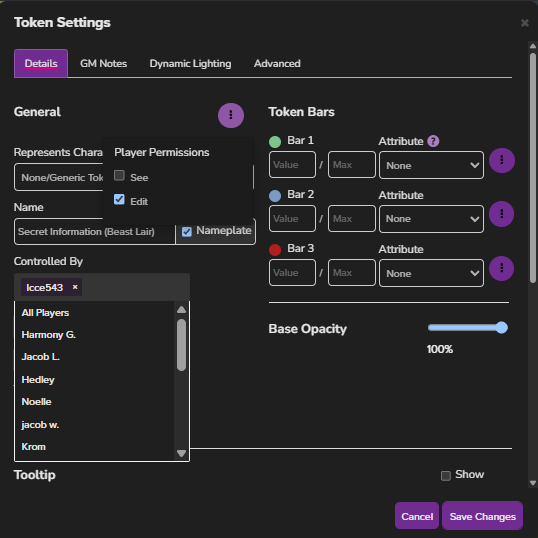
The players with edit permissions on that token will be able to see the aura, while other players will not. All permission settings on the token should be set this way, and all the “See” boxes should be left empty. This will allow you to place information on your map visible to only some players around it. You can use this for special landmarks, resources, or beast lairs to allow players to see what is around them easily without sharing the information with everyone.
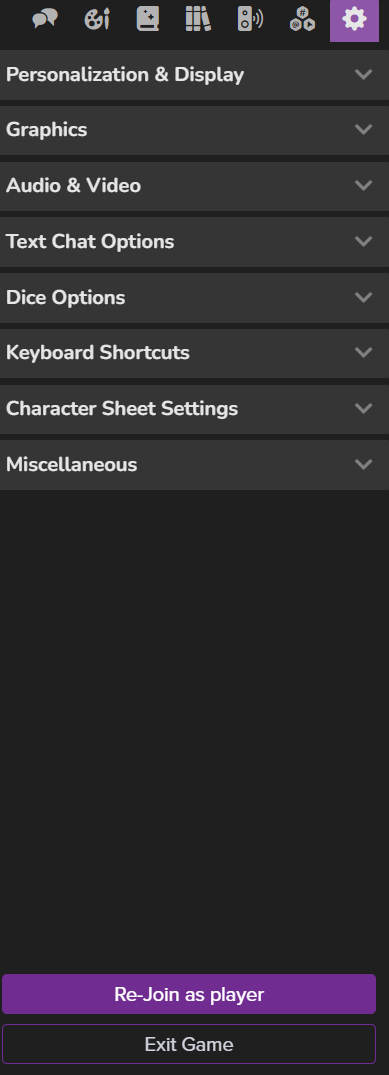
If you are not sure what the players do and don’t see, I recommend using the Re-join as player feature located at the bottom of the settings menu. This will help you make certain that the players can see the tokens and auras you want them to see without seeing the hidden information on the map.
Hopefully this helps answer any questions you have about running a hex-based war map in Roll20. Some of the features here have really helped me give the players a visual of the map that they can access at any time. While you may have a map IRL or may not be using software like Roll20 for your world map, it has been an invaluable tool for me for this purpose.